Iron on patches are one of those things that look simple until you’re standing in your kitchen with a scorched T-shirt, wondering where it went wrong. Done right, they hold for years. Done wrong, they peel off in the first wash or worse, they melt a hole in your favorite jacket.
This guide covers everything: what iron on patches are made of, how to apply them to cotton, denim, polyester, and other common fabrics, how to remove them without damaging your clothes, how long they actually last, and where to buy or order custom iron on patches in the USA.
If you’re a parent putting patches on a Scout uniform, a small business ordering branded workwear, or someone repairing a favorite pair of jeans, you’ll find exactly what you need here.
Need Custom Iron On Patches for Your Organization or Brand?The American Patch offers custom embroidered iron on patches with free digitizing, free mockups, and fast USA turnaround. Orders start at 1 pieces. |
What Are Iron On Patches?
An iron on patch is an embroidered, woven, PVC, or printed design attached to a fabric backing with a layer of thermoplastic adhesive, a heat-activated glue. At room temperature, the adhesive is solid and non-sticky. When you press a hot iron against it, it melts, flows into the weave of your garment, and re-solidifies as it cools, creating a mechanical bond between the patch and the fabric.
The adhesive activates at roughly 320–380°F (160–193°C). Below that range, nothing bonds. Above it, on heat-sensitive fabrics like nylon, things melt. That temperature window is why fabric type matters so much and why the instructions in this guide are specific about heat settings for each material.
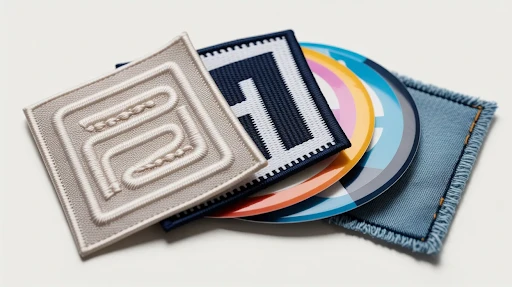
Types of Iron On Patches — What’s Available in the USA
Not every iron on patch is the same. The table below covers the main types you’ll find from US suppliers and retailers.
Types of Iron On Patches in the USA Table
| Type | Best For | Durability |
|---|---|---|
| Embroidered Iron On | Logos, uniforms, clubs, brands | Five Star |
| Woven Iron On | Fine detail, small text, intricate art | Four Star |
| PVC Iron On | Tactical gear, outdoor, weather-exposed | Five Star |
| Iron On Repair Patches | Fixing holes in jeans, elbows, knees | Four Star |
| Letter / Number Patches | Names, personalization, varsity style | Three Star |
| Fashion / Decorative | Denim jackets, bags, casual wear | Three Star |
| Disney / Licensed | Fan collections, kids’ clothing | Three Star |
Iron On vs. Sew On vs. Heat Press — Quick Comparison
Application Method Comparison Table
| Method | Ease | Bond Strength | Works On | Best For |
| Iron On (household iron) | Easy | Good (with back-press) | Cotton, denim, canvas | Home DIY, clothing, bags |
| Heat Press Machine | Moderate | Excellent | Most fabrics | Bulk orders, merch, professional |
| Sew On | Requires skill | Permanent | All fabrics | Uniforms, high-wear items |
| Iron On + Sew Edges | Moderate | Near-permanent | Cotton, denim | Scouts, sport jerseys, workwear |
| Fabric Glue | Very easy | Fair | Leather, nylon, vinyl | Materials that can’t handle heat |
How to Apply Iron On Patches — Step-by-Step
The process below works for cotton, denim, canvas, and linen the fabrics where iron on patches perform best. Fabric-specific instructions (polyester, hats, jeans, etc.) are covered in the next section.
What You Need Before You Start
- Household iron — temperature-adjustable, no steam
- Pressing cloth — a thin cotton pillowcase or parchment paper; never press directly on the patch or garment
- Hard flat surface — a wooden cutting board on top of a table works better than a padded ironing board alone; the padding absorbs pressure that should be going into the bond
- Pre-washed garment — fabric softener and moisture both interfere with adhesion
Step 1 — Pre-Wash and Prep Your Garment
Wash and fully dry the garment before applying the patch. This removes any factory finishing, sizing, or softener residue that sits on the fabric surface and reduces how well the adhesive grips. If you’re patching something brand new out of the bag, run it through one wash cycle first.
Step 2 — Position the Patch
Place the patch face-up in the exact position you want it. Use a ruler or a strip of masking tape along one edge to confirm placement. Once the iron makes contact, the adhesive begins to set, and repositioning after that almost always damages the bond. Get the placement right before applying any heat.
Step 3 — Set Your Iron to the Correct Temperature (No Steam)
Turn steam completely off. This is not optional. Moisture from steam prevents the thermoplastic adhesive from bonding properly. Use the temperature settings in Table 3 below based on your fabric.
Temperature Settings for Iron On Patches by Fabric (US Iron Settings) Table
| Fabric | Iron Setting (US) | Approx. Temp | Steam | Notes | Works? |
| 100% Cotton | Cotton / High | 375–400°F / 190°C | OFF | Best fabric with excellent adhesive bond. | ✓ Yes |
| Denim (Jeans, Jackets) | Cotton / High | 375–400°F / 190°C | OFF | Press 50–60 sec due to thickness; use a cutting board inside. | ✓ Yes |
| Linen | Linen / High | 445°F / 230°C | OFF | Iron dampened fabric first; excellent adhesion. | ✓ Yes |
| Wool | Wool / Medium-High | 300°F / 148°C | Damp cloth | Use a damp pressing cloth on top; don’t overheat wool. | ✓ Yes |
| Polyester Blend | Synthetic / Low-Med | 250–280°F / 121–138°C | OFF | Test the hidden area first; thick pressing cloth is required. | ⚠ Caution |
| Nylon / Polyamide | Very Low or Avoid | <212°F / <100°C | OFF | High melt/warp risk; sew instead or use fabric glue. | ✗ Not Rec. |
| Leather / Faux Leather | Avoid | N/A | — | Heat cracks leather; use fabric glue or hand-stitch. | ✗ Avoid |
| Waterproof / Technical | Avoid | N/A | — | Coatings melt/delaminate; adhesive won’t bond. | ✗ Avoid |
Step 4 — Press from the Front
Lay the pressing cloth over the patch. Press the iron straight down with firm, even pressure. Don’t slide it. Hold for 30–60 seconds, depending on fabric thickness 30 for a thin T-shirt, closer to 60 for a denim jacket. The pressing cloth protects both the patch face and the iron’s soleplate.
Common mistake: People press for 10–15 seconds and assume it’s done. It isn’t. Under 30 seconds on most fabrics produces a weak bond that fails within a few washes. Hold the iron in place longer than feels necessary.
Step 5 — Flip and Press from the Back
Turn the garment inside out and place the pressing cloth directly behind the patch area. Press firmly for another 30 seconds. This step draws the molten adhesive through from both directions and is the single biggest difference between a patch that lasts two years and one that peels after two washes. Most application failures come from skipping it.
Step 6 — Cool Down, Test, and Wash
Leave the patch untouched for at least 5 minutes. Then gently try to lift one corner. If it doesn’t budge, you’re done. If it lifts slightly, re-press both sides for another 20 seconds each and let it cool again.
For the first wash: turn the garment inside out, cold water, gentle cycle, and air dry. Tumble drying on high heat after a fresh application is one of the fastest ways to undo all that work.
How to Apply Iron On Patches Without an Iron
A hair straightener is the most reliable non-iron option for small and medium patches. Sandwich the patch between pressing cloths, clamp the straightener firmly over it, and hold for 20–30 seconds. The ceramic plates heat from both sides simultaneously, which actually gives decent results on smaller designs.
A heat press machine gives the strongest bond of any method if you’re applying patches to merch or team gear, a press is worth the investment. A hair dryer does not generate enough sustained heat and should not be used as a substitute for any of the above.
Iron On Patches on Different Items & Fabrics
Iron On Patches for Jeans (Denim)
Denim is one of the best fabrics for iron on patches. The tight cotton weave gives the adhesive plenty of fiber to grip. The challenge is that denim is thick, and regular ironing board padding absorbs too much pressure. Slide a wooden cutting board or a thick hardcover book inside the jeans leg before pressing.
This gives you a hard, flat surface directly behind the patch. Press on Cotton/High for 50–60 seconds on the front, then flip and press from the back for 30 seconds. For iron on patches on jeans used for repairs over holes or worn areas, add corner stitches afterward to secure the edges.
Iron On Patches for Hats & Baseball Caps
Hats are tricky because the curved surface and structured buckram panels don’t give you the flat pressing area the adhesive needs. For the front panel of a baseball cap, stuff the cap firmly with a hard, rounded object, such as a wooden bowl, a round can, or a specialty hat form to create a flat backing behind the panel. Press firmly with a pressing cloth for 30–45 seconds. Don’t rush this one.
For unstructured caps, the results are less predictable because there’s nothing rigid behind the fabric. A heat press with a hat attachment is the professional solution if you’re doing multiple caps. For single patches on a favorite hat, the stuffing method works well enough if you take your time.
Iron On Patches for Backpacks
Whether iron on patches work on a backpack depends entirely on what the bag is made of. Canvas and cotton backpacks take patches well. Slide a flat board inside the bag behind the area you’re patching and follow the standard cotton process.
Nylon backpacks, which include most school and outdoor bags, are a different story. Nylon melts at or below the temperature you need to activate the adhesive. For nylon bags, sew the patch on or use a strong fabric adhesive.
Iron On Patches for Shirts (T-Shirts, Polos, Work Shirts)
100% cotton T-shirts work well. Cotton-poly blends (the most common US shirt material) require more care, drop the iron to Synthetic/Low, and use a thick pressing cloth. Iron on name patches for workwear and uniform shirts benefit from stitching around the border after ironing, since work shirts typically go through commercial washing that’s harder on adhesive bonds than home washing.
Iron On Patches on Polyester — What You Need to Know
Yes, it’s possible. No, it’s not as reliable as cotton. Polyester softens and can permanently deform at temperatures slightly above what the adhesive needs to activate. Set your iron to Synthetic/Low (250–280°F / 120–138°C), use a thick pressing cloth, and test on a hidden area, an inside hem, or inner seam before pressing the actual patch.
For performance polyester like athletic jerseys, moisture-wicking shirts, and sports gear, sewing the patch is the better call. The fabric usually can’t tolerate enough heat for a reliable bond anyway.
Iron On Patches on Leather
Don’t do it. Leather is non-porous the adhesive has no fiber weave to sink into. And the 300–375°F temperatures needed to activate iron-on adhesive will crack, dry out, and discolor leather before anything bonds. This applies to both genuine leather and most faux leather. For leather jackets and leather bags, the right approach is a fabric adhesive like Beacon Fabri-Tac or E6000, or hand-sewing around the patch perimeter with upholstery thread.
Iron On Patches on Nylon — Why It’s Risky
Nylon has a melting point of roughly 375–500°F, depending on the specific type. That range directly overlaps with the temperature the adhesive needs to activate.
In practice, you’re playing a game where you need to hit the adhesive activation point without melting the fabric, and those two numbers are too close together to be reliable. Nylon backpacks, nylon jackets, and nylon sports gear should have patches sewn on. If you absolutely can’t sew, use a synthetic-rated fabric adhesive.
How to Remove Iron On Patches
Despite how secure a well-applied patch feels, iron on patches are removable. The same thermoplastic adhesive that bonds with heat can be softened with heat again.
The Heat and Peel Method (Step by Step)
- Place the garment face-up on a hard surface with the patch area accessible.
- Cover the patch with a pressing cloth and heat with your iron on the same setting you used to apply it for about 30 seconds.
- While the adhesive is still warm, slide tweezers or your fingernail under one corner and peel slowly and steadily. Work from one edge across rather than pulling straight up.
- If resistance increases, reheat for another 10–15 seconds before continuing.
- Let the fabric cool completely before assessing any adhesive residue left behind.
Removing Stubborn Adhesive Residue
After removing a patch, you’ll often find a faint sticky outline where the adhesive soaked into the fabric. Now you need to know how to remove iron on patch glue. Options for removal:
- Rubbing alcohol (isopropyl alcohol) — apply to a cotton ball, dab on the residue, and rub in circles. Available at any Walmart or drugstore.
- Goo Gone — works on thicker adhesive buildup. Available at Home Depot and Target.
- Acetone (nail polish remover) — effective but test on a hidden area first, as it can strip color or damage some synthetic fabrics.
Can You Remove Iron On Patches from Leather?
Since iron on patches shouldn’t be applied to leather in the first place, this question usually comes up when someone inherited a leather jacket with a patch already on it. Use a leather-specific adhesive remover, not heat, not acetone. Heat will damage leather even more, and acetone will strip the finish. Apply the leather adhesive remover carefully around the patch edges, let it work for a few minutes, then peel gently. Expect some minor discoloration in the patch area regardless.
Can You Reuse a Removed Iron On Patch?
Sometimes. If the patch came off cleanly with its full adhesive backing still intact and no glue was left behind on the garment, you can re-press it onto a new surface. More often, some adhesive transfers to the fabric on removal, leaving the patch backing depleted. In that case, cut a piece of fusible web tape (Heat ‘n Bond or Steam-A-Seam, available at Hobby Lobby, Joann, or Michaels) slightly smaller than the patch, press it to the patch back, peel the paper, and apply as normal.
How Long Do Iron On Patches Last?
This depends on three variables: how well the patch was applied, what fabric it’s on, and how the garment is washed and dried. On 100% cotton with a proper front-and-back press, expect 30–50 machine wash cycles before any edge lifting starts, that’s roughly 1–2 years of weekly washing.
How Many Wash Cycles Can Iron On Patches Survive?
The single biggest factor after application quality is washing temperature. Cold water on a gentle cycle preserves the adhesive bond far longer than hot water on a regular cycle.
Heat from the dryer is also an accelerant. Tumble drying on high heat softens the adhesive slightly on every cycle, and over dozens of washes, this causes gradual edge peeling. Air drying or low-heat tumble drying extends patch life noticeably.
Washing Instructions to Extend Patch Life
- Cold water only
- Gentle or delicate cycle
- Turn the garment inside out before washing
- Air dry or tumble dry on low
- No dry cleaning for patched garments, the solvents used can dissolve the adhesive
Iron On vs. Sew On — Which Lasts Longer?
In contrast to Sew on patches vs. iron on patches, sewn patches last longer. There’s no contest there. A full perimeter stitch on a well-applied iron on patch is practically permanent, you’d need to cut the thread to remove it.
Iron on alone, without stitching, it lasts well for casual wear but will eventually fail at the edges under repeated washing. For Scout patches, workwear, and sports uniforms, the recommendation is always to iron first (for positioning) and then sew (for durability).
The Iron + Sew Method — For Patches That Need to Last
Iron the patch in place first. Then, with the position set, run a straight or zigzag stitch around the border either by hand or on a sewing machine. This combination approach is the standard for Boy Scout merit badge patches, Girl Scout uniform patches, and custom iron on patches on workwear.
You can also add just corner stitches instead of a full perimeter, which still adds significant durability without as much sewing time.
Iron On Patch Durability by Method and Fabric Table
| Attachment Method | Expected Lifespan | Wash Cycles | Best Use Case |
| Iron On Only (cotton) | 1–2 years | 30–50 washes | Bags, casual jackets, decorative items |
| Iron On + Corner Stitches | 3–5 years | 80–100+ washes | Jeans, kids’ clothing, school items |
| Full Perimeter Stitch | 5+ years | Near-permanent | Uniforms, Scout patches, workwear |
| Heat Press (professional) | 2–4 years | 60–80 washes | Merch, team gear, event patches |
| Fabric Glue (leather/nylon) | 6–18 months | 20–30 washes | Heat-incompatible fabrics only |
Custom Iron On Patches for Uniforms, Events & WorkwearNeed patches that hold up to commercial washing and daily wear? The American Patch produces custom embroidered iron on patches built for exactly that. Free digitizing included.Request a Free Mockup
Custom Iron On Patches for Uniforms, Events & WorkwearNeed patches that hold up to commercial washing and daily wear? The American Patch produces custom embroidered iron on patches built for exactly that. Free digitizing included. |
Where to Buy Iron On Patches in the USA
Iron On Patches at Walmart
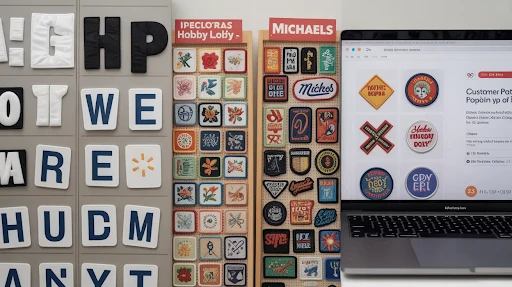
Walmart carries iron on patches in the sewing and notions aisle, mainly iron on repair patches for jeans (oval and rectangular denim patches), iron on letter patches for names, and a limited selection of decorative patches. Prices run $1–$5 for basic repair patches. What you won’t find at Walmart: custom designs, bulk orders, branded logos, or anything beyond standard off-the-shelf options. For a ripped pair of jeans or a missing letter on a kid’s bag, Walmart is fine. For anything requiring a specific design, it’s the wrong stop.
Iron On Patches at Hobby Lobby
Hobby Lobby carries the widest in-store craft patch selection of the three major retailers. Their notions section typically stocks embroidered iron on patches in various themes (animals, florals, seasonal designs), heat transfer vinyl, and fusible web products. Prices vary. One practical note: Hobby Lobby is closed on Sundays relevant if you’re in a patch emergency on a weekend.
Iron On Patches at Michaels
Michaels stocks iron on patches in their fabric and sewing section, with a good seasonal range. Their selection skews toward crafting and decorative patches rather than repair or customization. They also carry fusible web tape (Heat ‘n Bond) and iron on transfer paper, which are useful for DIY patch projects. Pricing is similar to Hobby Lobby.
Iron On Patches Near Me — Finding Local Options
Beyond Walmart, Hobby Lobby, and Michaels, local options include fabric stores (Joann Fabrics is the largest US chain), uniform supply shops, and embroidery businesses.
If you search “iron on patches nearby” on Google Maps, filter results to show craft stores and sewing suppliers. For anything standard, repair patches, letter patches, basic embroidered designs, local stores work fine.
For custom iron on patches with specific logos, colors, or quantities, local stores almost never have what you need; that’s what online custom suppliers are for.
Custom Iron On Patches Online — What to Look For
When evaluating a US-based custom patch supplier, the things that matter most are: minimum order quantity (most reputable suppliers start at 50 pieces), turnaround time (10–14 business days is standard; be skeptical of anything claiming 2–3 days), whether digitizing and mockups are free (they should be), and whether the company has verifiable US reviews. The American Patch’s customer reviews and testimonials are publicly listed and that level of transparency is what you should expect from any supplier you’re considering.
How to Make Iron On Patches at Home
If you want a custom patch design and aren’t ready to place a bulk order, there are three DIY methods that actually work. Each has different strengths depending on your design and what tools you have.
Method 1 — Iron On Transfer Paper (Inkjet Printer)
Buy iron on transfer paper. Avery and Printworks are the common brands available at Walmart, Staples, and Michaels. Design your patch in Canva or any image editor, print it onto the transfer paper, then iron it onto felt or twill fabric and cut it to shape.
You can add fusible web tape to the back to make it iron-on capable. Best for photographic or multi-color designs where embroidery isn’t practical. The main limitation: transfer paper patches are less wash-durable than embroidered patches and can crack over time.
Method 2 — Heat Transfer Vinyl (HTV + Cricut)
Heat transfer vinyl cut on a Cricut Explore, Cricut Maker, or Silhouette Cameo is the preferred DIY method for clean, bold, single-color designs. Cut the vinyl, weed out the negative space, and press the design onto your twill or felt base. HTV is more durable than transfer paper and handles washing better.
Method 3 — Hand Embroidery + Fusible Web Backing
This gives the most professional-looking result of the three DIY methods, though it takes the most time. Embroider or machine-embroider your design on twill fabric, cut it to shape with clean edges (pinking shears help prevent fraying), then press a strip of fusible web tape (Heat ‘n Bond Light, available at Hobby Lobby and Joann Fabrics) to the back. Once the paper backing is peeled, the patch is iron-on ready. If your design needs to last through a lot of washing, Scout patches, uniform patches, kids’ clothing, this is the method worth the effort.
Custom Iron On Patches — Ordering Guide for Individuals, Schools & Businesses
Who Orders Custom Iron On Patches?
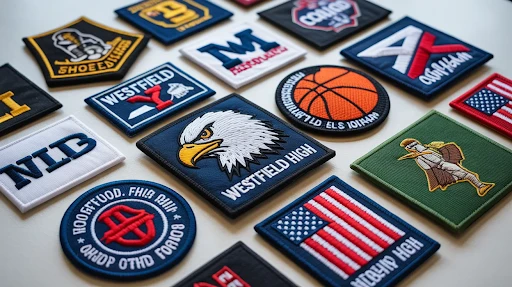
The range is wider than most people expect. Schools and universities are ordering logo patches for uniforms, backpacks, and spirit gear. Sports teams need iron on patches for jerseys and bags. Motorcycle clubs and fraternal organizations are ordering chapter patches.
Small businesses are adding branded patches to workwear and company apparel. Scout troops are ordering custom patches for events and achievements. Etsy sellers are creating patch-based products. Military and law enforcement units are ordering morale patches. The common thread: anyone who needs a specific design in quantity.
Pricing Guide — What Custom Iron On Patches Cost in the USA
Prices above are estimates for standard embroidered iron on patches at 75–80% thread coverage. PVC patches, woven patches, and patches with unusual shapes or thread counts will have different pricing. Most reputable US suppliers include free digitizing and a free digital mockup in their pricing, if a supplier charges separately for these, that’s worth noting before you commit.
Backing Options — Iron On, Sew On, Velcro, and More
When ordering custom patches, you choose the backing separately from the patch design. Common options:
- Iron on — heat-activated adhesive backing; the default for apparel applications
- Sew on — no backing; patch is stitched directly to the garment
- Velcro (hook-and-loop) — popular for tactical gear, uniforms, and bags where patches rotate
- Peel-and-stick — temporary; not wash-durable
- Plain back — unfinished; used when the customer adds their own backing
Many orders use a combination, for example, iron on for most pieces and sew on for the few pieces going on leather or nylon gear, where iron on backing won’t work. Good suppliers accommodate mixed backing orders. You can also see the full range of sew on patch options and embroidered patch types on the product pages.
Design Tips for Your First Custom Patch Order
- Keep text readable at actual patch size.
Text smaller than about 3mm tall gets lost in the embroidery thread. If your design has fine print at a 3-inch patch size, simplify before you order.
- Stick to Pantone or standard thread colors.
Request a thread color chart from your supplier before finalizing. Embroidery thread colors do not map exactly to digital color codes.
- Provide the highest-resolution file you have.
Vector files (AI, EPS, SVG) are best. High-resolution PNG or JPG works for simpler designs.
- Decide on a border style.
Merrowed (overlocked) borders are standard for oval and rectangle patches. Cut edges work for irregular shapes.
- Approve the digital mockup before production.
Any supplier worth ordering from will send a digital proof. Review it carefully for color accuracy and text readability before giving the go-ahead.
How to Order from The American Patch
The process is straightforward:
- Send your design, size, quantity, and backing preference through the quote request form.
- Receive a free digital mockup showing your design in actual patch form.
- Approve the mockup or request revisions. Revisions are free.
- Production begins on approval. Standard turnaround is 2 to 3 weeks
- Patches ship to anywhere in the USA.
FAQ
How do you iron on patches?
Place the patch face-up on a pre-washed garment, cover with a pressing cloth, and press a steam-free iron on the Cotton/High setting firmly for 30–60 seconds without sliding. Flip the garment and press from the back for another 30 seconds. Cool for at least 5 minutes before testing the bond.
Can you remove iron on patches?
Yes. Reheat the patch with your iron and a pressing cloth for about 30 seconds to soften the adhesive. While still warm, peel from one corner using tweezers and work slowly across. Rubbing alcohol on a cotton ball removes any adhesive residue left on the fabric.
How long do iron on patches last?
On cotton or denim with proper application: 30–50 machine wash cycles, or roughly 1–2 years of regular wear. Add corner stitching and that extends to 80–100+ washes. Cold water washing and air drying are the biggest factors in patch longevity beyond application quality.
Do iron on patches work on all fabrics?
No. They work best on cotton, denim, and linen. They require caution on polyester blends. They should not be applied to nylon, waterproof or technical fabrics, leather, faux leather, vinyl, or silk.
Can you iron on patches to polyester?
It’s possible with caution. Set your iron to Synthetic/Low (250–280°F / 120–138°C) and use a thick pressing cloth. Test on a hidden area first. For performance polyester and sports jerseys, sewing the patch on is more reliable and safer for the fabric.
Can you iron on patches to leather?
No. The heat required to activate iron-on adhesive will crack and permanently discolor the leather. Leather is also non-porous, so adhesive has nothing to bond into. Use a fabric adhesive like Beacon Fabri-Tac or hand-sew around the patch edges instead.
How to iron on patches without an iron?
A hair straightener works well for small to medium patches. Sandwich the patch between pressing cloths, clamp the straightener firmly, and hold for 20–30 seconds. A heat press machine gives the best result of any method. A hair dryer does not reach high enough temperatures to work.
Can you sew iron on patches?
Yes, and combining iron-on application with sewing is the most durable method. Iron the patch first to lock in its position, then stitch around the perimeter by hand or machine. This is standard practice for Scout patches, sports uniforms, and workwear.
How to iron on patches on jeans?
Slide a wooden cutting board or thick hardcover book inside the jeans leg to create a hard backing. Position the patch, cover with a pressing cloth, and press on Cotton/High for 50–60 seconds. Flip inside out and press from the back for 30 seconds. Denim’s thickness requires the full pressing time.
How to iron on patches on a hat?
Stuff the cap firmly with a rounded hard object, a wooden bowl, or a can to create a flat surface behind the panel. Press with a pressing cloth for 30–45 seconds. Structured hats with buckram backing handle heat better than unstructured caps. For best results on multiple hats, use a heat press with a hat attachment.
How to iron on Girl Scout patches?
Lay the uniform flat on a hard surface. Position the patch. Cover with a pressing cloth and press on Cotton/Medium for 30–45 seconds. Press from the back for another 20 seconds. For patches that need to survive the full scouting year, add a few perimeter stitches after ironing.
Where to buy iron on patches near me?
Best in-store options in the US: Hobby Lobby (widest craft patch selection), Michaels (good seasonal range), and Walmart (repair and letter patches). Joann Fabrics carries fusible web products. For custom designs or bulk orders, an online specialist like The American Patch gives you far more options than anything available locally.
How do you make iron on patches stay on?
Four things make the difference: press long enough (30–60 seconds on the front, 30 seconds on the back), use a hard flat surface behind the fabric, wash in cold water on a gentle cycle, and add corner stitches after ironing. That last step alone can triple a patch’s lifespan on high-use garments.
Can you iron on patches to nylon?
Generally no. Nylon’s melting point of 375–500°F overlaps directly with the temperature range needed to activate iron-on adhesive. The risk of melting, warping, or deforming nylon is too high for reliable application. Sew patches onto nylon backpacks, jackets, and sports gear instead.
Can you reuse iron on patches?
Sometimes. If the patch peeled off cleanly with its full adhesive backing intact, re-pressing works. If adhesive stayed on the fabric and the patch backing is depleted, cut a piece of fusible web tape slightly smaller than the patch, press it to the back, and apply as normal. Fusible web tape is available at Hobby Lobby, Joann, and Michaels.
What temperature should I use to iron on patches?
Cotton and denim: Cotton/High setting (375–400°F / 190–204°C), no steam. Polyester blends: Synthetic/Low (250–280°F / 121–138°C), thick pressing cloth. Wool: Wool setting (300°F / 148°C) with a slightly damp pressing cloth. Always check the care label first and use the lowest temperature the fabric can handle safely.
How long does it take to iron on a patch?
Active pressing time: 30–60 seconds on the front, 30 seconds on the back. Add 5–10 minutes of cooling time before testing the bond. The full process from setup to finished patch is under 15 minutes, including setup and cool-down.
Are iron on patches permanent?
Semi-permanent. Strong enough to last years of regular washing, but removable with reheating. Adding perimeter stitching after ironing makes them significantly more permanent. For military uniforms, professional workwear, and competitive sports gear, the full perimeter stitch method is recommended over iron-on alone.
How to make iron on patches at home?
Three methods: (1) Print on iron-on transfer paper from Walmart or Staples, press onto felt or twill, cut to shape; (2) cut heat transfer vinyl on a Cricut or Silhouette, press onto twill base; (3) embroider by hand or machine onto twill fabric, cut to shape, and press fusible web tape to the back. Method 3 gives the most professional result and the best wash durability.
How to order custom iron on patches in the USA?
Steps: choose a patch type (embroidered is the most popular and durable), prepare your design file (JPG, PNG, or AI vector), contact a US-based supplier like The American Patch for a free quote and digital mockup, approve the design proof, and receive your patches in 2 to 3 Weeks
Reputable US suppliers include free digitizing, free mockup, and free shipping in their pricing. Minimums typically start at 1 pieces with significant price reductions at 100+.
Ready to Order Custom Iron On Patches for Your Team, Business, or Organization?The American Patch makes custom embroidered iron on patches for schools, sports teams, businesses, and Scout programs across the USA. Free digitizing. Free mockup. No hidden fees. |
Get Iron on Patches Online for Your Next Project
Iron on patches work. When they don’t, it’s almost always a process problem, wrong temperature, not enough pressing time, skipping the back-press, or the wrong fabric. Follow the steps in this guide, match your iron setting to your fabric, and use the sandwich method. Most people who’ve had patches fail haven’t been told about pressing from the back.
If you need custom iron on patches for a team, a business, a school, a Scout troop, or anything else, The American Patch handles custom orders with free digitizing and free mockups.
Questions about a specific application or fabric situation? Use the contact form, and someone on our team will get back to you directly.