
Every parent or leader of the Boy Scouts knows what happens when a Court of Honor is over. You get a bunch of Boy Scout merit badges and other patches to put on a Boy Scout uniform.
It is a proud moment for the Boy Scouts. Then you start thinking about how to get all these Boy Scout patches to attach to the uniform. The big question is, are Boy Scout patches iron-on?
The answer to this question is that it depends on the Boy Scout patch. Even if you can iron on the Boy Scout patch, you have to be careful when you do it.
A lot of Boy Scout patches have adhesive backings now as of new tech. The Boy Scouts of America (BSA) has its official stance varied and prefers sewing because sew-on patches are permanent.
This guide will walk you through on how to tell if a Boy Scout patch is iron-on. It will also give you a step-by-step process for the Boy Scout patch application while fixing any problems that may occur when using this attachment method.
The Reality: Are Boy Scout Patches Iron-On Ready?
Historically, patches required sewing. Today, many official BSA patches come with a distinct plastic-like coating on the back. This coating is a heat-seal adhesive, intended for iron-on patch application.
However, there are a few important caveats:
Merit Badges vs. Uniform Patches: Many one-day event or temporary iron-on patches are simple to use. The small merit badges are a different story, though. These merit badges have an adhesive backing that requires heat to attach. The problem is that they are really small. It is difficult to iron them on without messing up the uniform around them. You have to be careful when you iron on these merit badges.
Adhesive Damage: The Boy Scouts of America advocated for years that sewing is the way to go. It is because the strong glue that comes with the Boy Scout iron-on patches can hurt the uniform if you need to take the patch off or move it to a different spot. Patch changes happen a lot as a boy scout gets older and moves up in rank.
Durability: No matter how strong the glue is, a washing machine with heat and agitation will eventually weaken it. A patch that is sewn on will last as long as the uniform itself. In comparison, an iron-on patch might only last for one season.
Result: Many uniform patches for scouts are iron-on capable, but sewing is always the superior method for durability and uniformity preservation.
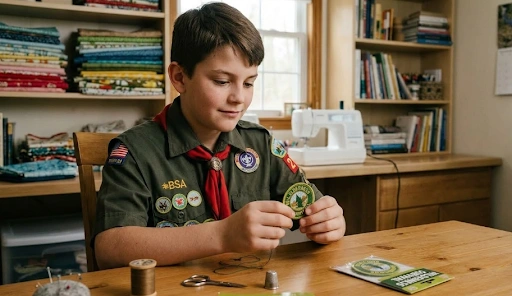
The Pros and Cons of Iron-On Application
Before you plug in the iron, weigh the quick fix against the long-term wear.
Pros:
- Speed: It takes minutes rather than an hour of tedious stitching.
- Convenience: No needle, thread, or sewing skills required.
- Immediate Look: Gives a very flat, crisp look immediately after application.
Cons:
- Temporary: The adhesive fails over time with peeling corners that are common.
- Uniform Damage: Can leave difficult-to-remove residue or scorched patches if done incorrectly.
- Difficulty Removing: If a Scout earns a new rank, removing the old iron-on rank patch is difficult and may ruin the shirt pocket.
Step-by-Step Guide: How to Iron On Scout Patches
If you have decided to use the heat method, follow below steps precisely to ensure the best possible bond and to protect the expensive uniform.
Supplies Needed:
- The patch with heat-seal backing
- The scouting uniform which is clean and wrinkle-free
- An iron with dry and no-steam setting
- A pressing cloth, which is a thin cotton fabric like a pillowcase or linen napkin
- An Ironing Board
The Process for Boy Scout Patches Application:
1. Pre-Check the Fabric
When you buy an official BSA uniform, it can be made from different materials. You might get cotton blends, poplin, or synthetic blends. The thing about blends is that they can melt if they get too hot.
So you need to check the care label. If it has a do not iron or low heat label, then you cannot put an iron-on patch on it. In this case, you have to sew the patch on your uniform.
2. Position the Patch
Placement is really important when it comes to scouting. To get everything right, you should look at the scout uniform inspection sheet. This sheet will tell you the right placement.
An example is to put the rank patch on the left pocket. It is also great to use a ruler so you can be very precise. You can use a sewing pin to hold the patch in place for a while. Just remember to take the pin out before you start to iron over that spot.
3. Heat the Iron
Use a medium-high cotton or linen setting on the iron. Important note: Turn off steam mode because it has moisture. The moisture prevents the adhesive from bonding properly.
4. Pre-Heat the Uniform
Before attaching the patch on the uniform, iron the spot where the patch will go. The heat from the iron makes the adhesive on the patch attach faster to the ironed spot.
5. Apply the Pressing Cloth
Place the patch on the uniform. Lay the thin pressing cloth directly over the patch. Never iron directly on the patch. The direct heat can melt the embroidery threads, ruining the design.
6. Apply Heat and Pressure
Press the iron firmly down on the pressing cloth over the patch. Do not move the iron back and forth (as you would when ironing a shirt), as this can shift the patch. Instead, apply firm, steady vertical pressure for 30 to 45 seconds.
7. Flip and Repeat
For a stronger bond, turn the uniform inside out. Apply the pressing cloth over the area behind the patch, and press firmly for another 20–30 seconds.
8. Cool and Check
Let the patch and uniform completely cool down. Do not touch until then. The adhesive needs time to stick properly. Try to carefully lift the edges using your fingernail. If some parts still come off easily, you have to redo steps 6 and 7. Apply a bit more pressure and leave it to stick for slightly longer.
Common Problems and Fixes for Falling Patches
You have followed the steps for how to iron on scout patches, but two months later, the corners are now peeling. This is very common. Here is how to prevent iron-on patches from falling off:
The Corner Peel Fix
If only the edges are lifting, the simplest fix is to reapply heat. Use the pressing cloth method again, focusing specifically on pressing down the peeling edges with the tip of the iron for about 20 seconds.
The Adhesion Failure (The Perimeter Stitch)
If a patch keeps peeling off despite being ironed on again and again, the adhesive has become weak. The only option at this point is sewing.
You do not need to be an expert. The best strategy is the perimeter stitch:
- Get a needle and thread that matches the outer edge, which is the border of the patch.
- Use a simple whip stitch or a running stitch around the edge of the patch.
- You only need to sew through the patch border and the top layer of the uniform fabric. This keeps the patch flat, also making sure that it will never fall off again.
The Fabric Glue Option
If you really do not know how to sew, you can use other methods without sewing, like Badge Magic or Liquid Stitch. Badge Magic is a strong sticker sheet that you can use for patch attachment, or you can use Liquid Stitch fabric glue.
Caution: These glues are really strong and difficult to remove from the uniform without causing damage. You should only use these glues if you are sure that the patch will never be taken off or moved to a different spot on the uniform.
The Recommended Approach
While understanding that iron-on is helpful as a quick attaching method, the best practice is a hybrid approach.
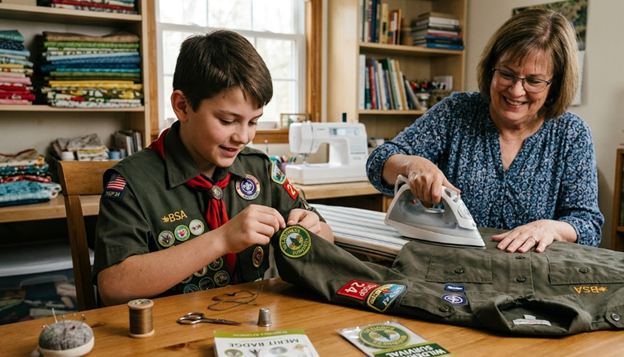
The Pro-Scout Parent Method:
- Use the iron-on method to quickly and precisely position the patch.
- Once the uniform cools down, do a few simple stitches on the corners or a full perimeter stitch to make it double secure.
This hybrid approach is really great because it gives your Scout uniform the flat look of an iron-on application with the lifetime durability of a sew-on patch. So your Scout uniform will stay sharp and look good for a long time even after many camping trips and laundry cycles.
Frequently Asked Questions
Why do people mostly iron-on Boy Scout patches?
Boy scout patches are commonly ironed on because of the convenience associated with the method.
What is the recommended backing for Boy Scout patches?
BSA recommends sewing on the Boy Scout patches. It is the most durable and, when removed, does not leave behind glue marks.
How do I secure my Boy Scout patch if it comes with iron-on backing?
You can first apply it with a hot iron and later stitch the Boy Scout patch border to make it more secure.
What is the easy way to swap my Boy Scout patches?
If you find iron-on and sew-on methods hard to remove, you can try Velcro backings for your Boy Scout patches. They are the best for constant swapping of your patches.
Securely Attach Your Boy Scout Patches
Once you are done reading our detailed blog on attaching Boy Scout patches, you are now familiar enough to decide between iron-on and sew-on. Not only do you know all about them, but you also should know that there is a third way out
with Velcro for easy swapping.
If you are ready and looking to place orders for Boy Scout patches for your team or maybe for your collection, you can contact The American Patch for the best patches in the entire United States. We offer our customers free consultation and mockups before the final production so they do not have to worry about the whole ordering process.
To get free advice from our team of experts for your Boy Scout patches, contact us now!