You can add custom patches to caps, shirts, jackets, and even pants to make your outfit more stylish and vibrant. Custom patches also showcase your affiliation or unique ideas.
However, if the custom patch sizing is measured incorrectly, instead of adding flair to your clothing, the patch can take away from its original charm.
In this guide, we’ll share the standard sizes of custom patches for uniforms, jackets, and special events. That way, when you order your custom patch, you’ll know exactly what size to choose for the perfect look.
How to Select the Perfect Patch Size
When choosing the right size for your custom patch, keep these three factors in mind:
Placement: The size should match the placement. For example, a hat patch needs to be small enough to sit neatly on the front panel, while a back patch for a jacket can be much larger.
Design Detail: Patches with fine text or intricate artwork often require more space so the design remains clear and readable.
Proportion: The patch should enhance the garment without overwhelming it. Oversized patches can dominate the look, while undersized ones may get overlooked.
As a general guideline, measure the area where you plan to apply the patch and leave some margin around the edges for a balanced, polished appearance.
Secondly, it’s best to order patches from experts who work with precise measurements, such as The American Patch. We create uniform, brand, and logo patches in standard sizes. If the makers lack expertise, the sizes may come out inaccurate, which can affect both the quality and the appearance of your patch.
Patch Size Guidelines by Use Case
When you design your own patch, the size you choose matters just as much as the artwork itself. Below are common patch size guidelines that can help you achieve the right balance of style, visibility, and function.
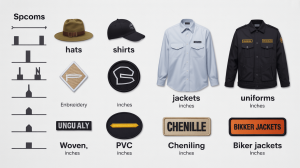
Hats and Caps
For caps, patches should remain small enough to sit neatly on the front panel without overwhelming it. The ideal width is between 2 and 3.5 inches, with a height of 1 to 2.5 inches. Popular shapes include rectangles, squares, ovals, and circles around 2.25 inches.
Shirts and Jackets
On shirts, chest patches typically measure about 3 by 2 inches, while sleeve patches average around 2 inches. For jackets, a front patch usually ranges from 4 to 5 inches, while back patches can be much larger, around 10 to 12 inches, especially when you want the design to stand out.
Logo and Branding Patches
When you design your own logo patch, a common size is about 3.5 inches. This is large enough to showcase the brand clearly while still being versatile across different types of clothing or accessories.
Uniform and Professional Patches
For uniforms, such as those used by the military, police, firefighters, or security teams, patches usually fall between 3 and 5 inches in height or width. This range provides enough visibility for identification while maintaining a professional appearance.
Biker and Motorcycle Club Patches
Back patches for biker jackets are traditionally very large, often measuring 10 to 12 inches. These oversized designs make a bold statement and are perfect for representing club identity.
Morale, Scout, and Sports Patches
Scout patches are usually around 3 inches, a size that is practical for sashes, uniforms, or vests.
Morale patches often range from 2 to 3 inches, making them compact enough to attach to gear or clothing while still being eye-catching.
Sports patches are generally 3 inches or smaller, ensuring they complement the uniform without overshadowing the overall design.
How to Calculate the Ideal Patch Size with Accuracy
One of the most reliable ways to determine the correct size for your custom patch is by using the average formula:

This simple calculation is widely used across the industry to help customers and manufacturers agree on the most accurate dimensions. It ensures your patch is proportionate, balanced, and suited for its placement.
At The American Patch, we follow this exact formula when producing custom designs, whether for uniforms, brands, or special events.
By combining precise measurements with expert craftsmanship, we make sure every patch comes out in the perfect size and shape. So your design always looks professional and polished.
Key Factors That Affect Patch Sizing
When choosing the right patch size, several factors beyond placement can affect the final look and usability of your design.
Design Complexity
If your patch includes fine details, small lettering, or intricate artwork, a larger size is often necessary to ensure clarity.
For example, a text-heavy design or something symbolic like an American flag patch will always look sharper when given enough space for precision.
Proportion and Aesthetic Balance
A patch should always complement the item it is applied to. The right proportion enhances the overall style, while an oversized patch may overpower the garment. Conversely, a patch that is too small might lose its visual impact.
This is why expressive designs, such as a Punk Rock patch on a denim jacket, are often made slightly larger to deliver maximum attitude and presence.
Material Constraints
Different production methods can limit how detailed a patch can be at smaller sizes. Embroidered patches look bold and textured, but may blur fine lines if the patch is too small. Woven patches, on the other hand, allow for finer detail at reduced sizes.
How to Choose the Right Patch Type: What You Need to Know
Custom patch sizing varies across different patch types. For example, embroidered patches often need to be larger than PVC patches to maintain clarity. To make this easier to understand, we have listed each patch type along with its sizing considerations below:
| Patch Type | Best Use Case | Sizing Consideration |
| Embroidered | Bold logos, classic textured look | Small details may blur if the patch is too small |
| Woven | Intricate logos, fine lettering | Maintains detail even at smaller sizes (2–3 inches) |
| PVC | Durable, 3D designs | Works best at medium sizes (3–4 inches) |
| Chenille | Letterman jackets, varsity, or bold style patches | Shows texture best in larger sizes (4–6 inches) |
When choosing the patch type, also consider the structure of the garment or hat and the attachment method, as custom patch pricing can vary accordingly. Stiffer hats can support larger patches, while softer hats require smaller ones for proper balance.
Patch Size Guide at a Glance
To make patch sizing easier to understand at a glance, a compact table can summarize key information:
| Application | Typical Size Range | Key Notes |
| Hat | 2–3.5 inches wide, 1–2.5 inches high | Placement matters; stiffer hats allow larger patches |
| Uniform | 3–5 inches | Consider design complexity and proportion for visibility |
| Shirt Chest | ~3×2 inches | Best for logos; small enough to be subtle |
| Shirt Sleeve | ~2 inches | Keep in proportion with garment; avoid overpowering |
| Jacket Front | 4–5 inches | Ideal for logos or small designs |
| Jacket Back | 10–12 inches | Allows for bold, statement designs, e.g., biker patches |
This table gives a quick reference for typical patch sizes while highlighting factors such as design complexity, shape, and placement that can influence the final result.
FAQ
How do I know what size patch I need?
The size of a patch depends on where you plan to place it and the level of detail in your design. Smaller areas like hats or sleeves need compact patches, while larger areas such as jackets can handle bigger, more intricate designs. Measuring the space first ensures the patch fits well and looks balanced.
Can I put custom patches on any clothing?
Yes, custom patches can be applied to shirts, jackets, hats, and even pants. The type of patch and attachment method matter, so you get the best look without damaging the fabric. Sew-on patches work almost anywhere, while heat-seal patches need flat surfaces.
Does patch type affect size?
The type of patch directly affects how large it should be. Embroidered patches usually need more space to show details clearly, whereas woven or PVC patches can be smaller and still remain legible. Material and design complexity are important factors when deciding the perfect size.
Where should I get my custom patch made?
The American Patch provides expert guidance and precision in producing custom patches, whether for uniforms, brands, or personal designs. Working with professionals ensures the sizing, stitching, and quality are perfect. You can trust the process to get a patch that looks polished and lasts long.
Conclusion
The right size for a custom patch is just as important as the design itself. Size affects visibility, proportion, and overall impact, whether it is an embroidered logo on a uniform, a bold statement patch on a biker jacket, or a subtle design on a hat.
Considering factors such as patch type, material, garment structure, and attachment method ensures your patch looks polished and professional.
Planning ahead also helps manage custom patch pricing, allowing you to balance quality, size, and cost effectively. With the guidelines and charts provided in this guide, you can confidently design your own patch that fits perfectly and makes a lasting impression.